OpsGenie
URL Format
URL Fields
- Host - The OpsGenie API host. Use 'api.eu.opsgenie.com' for EU instances
Default:
api.opsgenie.com
URL part:opsgenie://host:port/apikey/ - Port - The OpsGenie API port.
Default:
443
URL part:opsgenie://host:port/apikey/ - APIKey - The OpsGenie API key (Required)
URL part:opsgenie://host:port/apikey/
Query/Param Props
Props can be either supplied using the params argument or through the URL using
?key=value&key=value etc.
-
actions - Custom actions that will be available for the alert Default: empty
-
alias - Client-defined identifier of the alert Default: empty
-
description - Description field of the alert Default: empty
-
details - Map of key-value pairs to use as custom properties of the alert Default: empty
-
entity - Entity field of the alert that is generally used to specify which domain the Source field of the alert Default: empty
-
note - Additional note that will be added while creating the alert Default: empty
-
priority - Priority level of the alert. Possible values are P1, P2, P3, P4 and P5 Default: empty
-
responders - Teams, users, escalations and schedules that the alert will be routed to send notifications Default: empty
-
source - Source field of the alert Default: empty
-
tags - Tags of the alert Default: empty
-
title - notification title, optionally set by the sender Default: empty
-
user - Display name of the request owner Default: empty
-
visibleto - Teams and users that the alert will become visible to without sending any notification Default: empty
Creating a REST API endpoint in OpsGenie
-
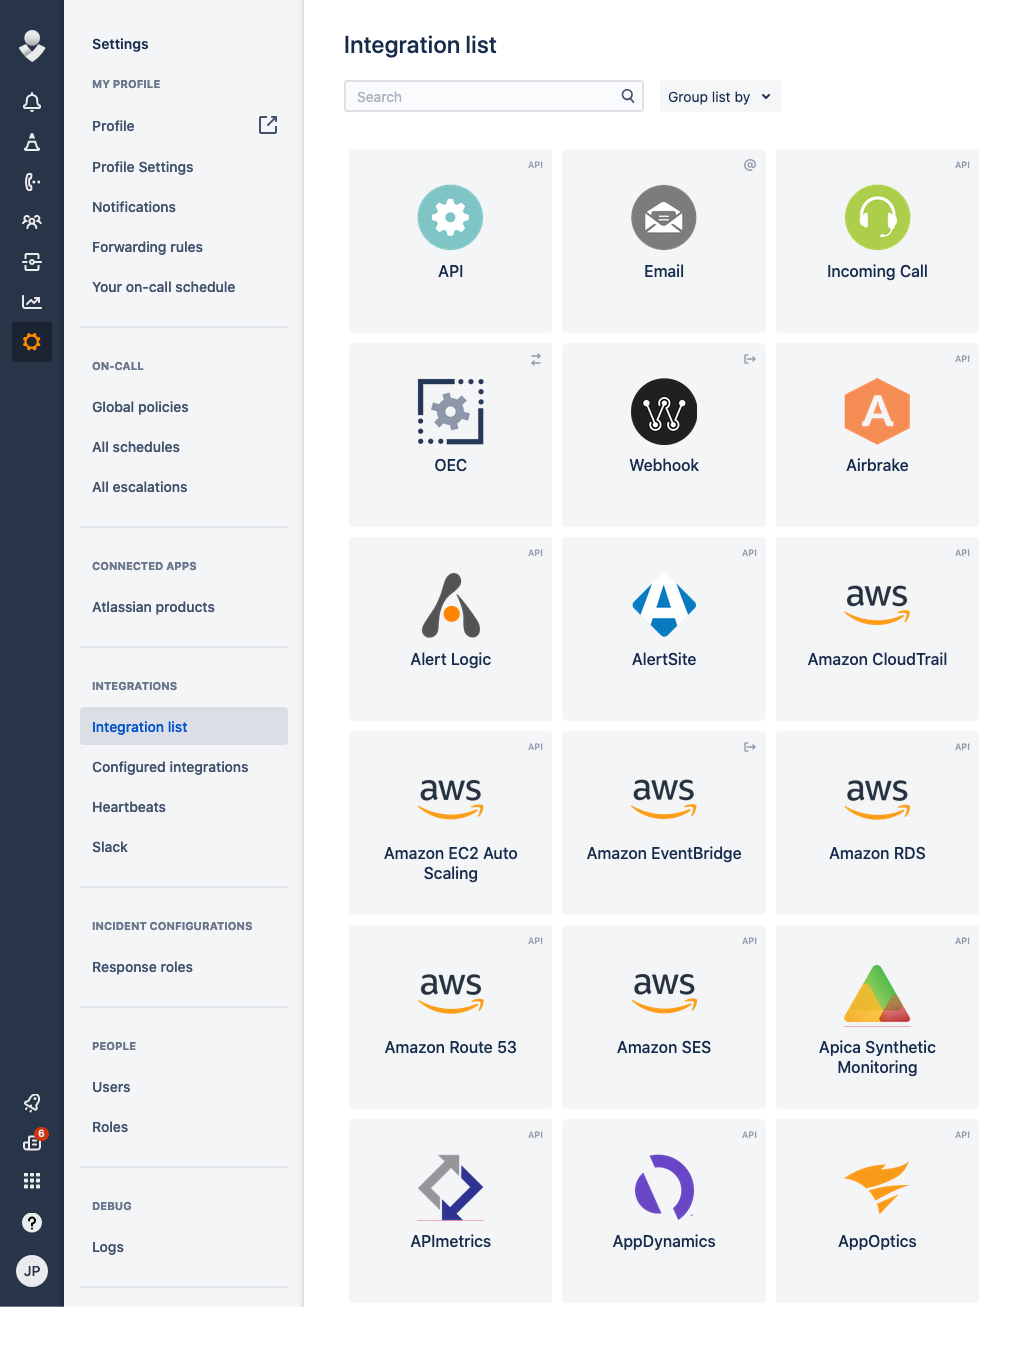
Open up the Integration List page by clicking on Settings => Integration List within the menu
-
Click API => Add
-
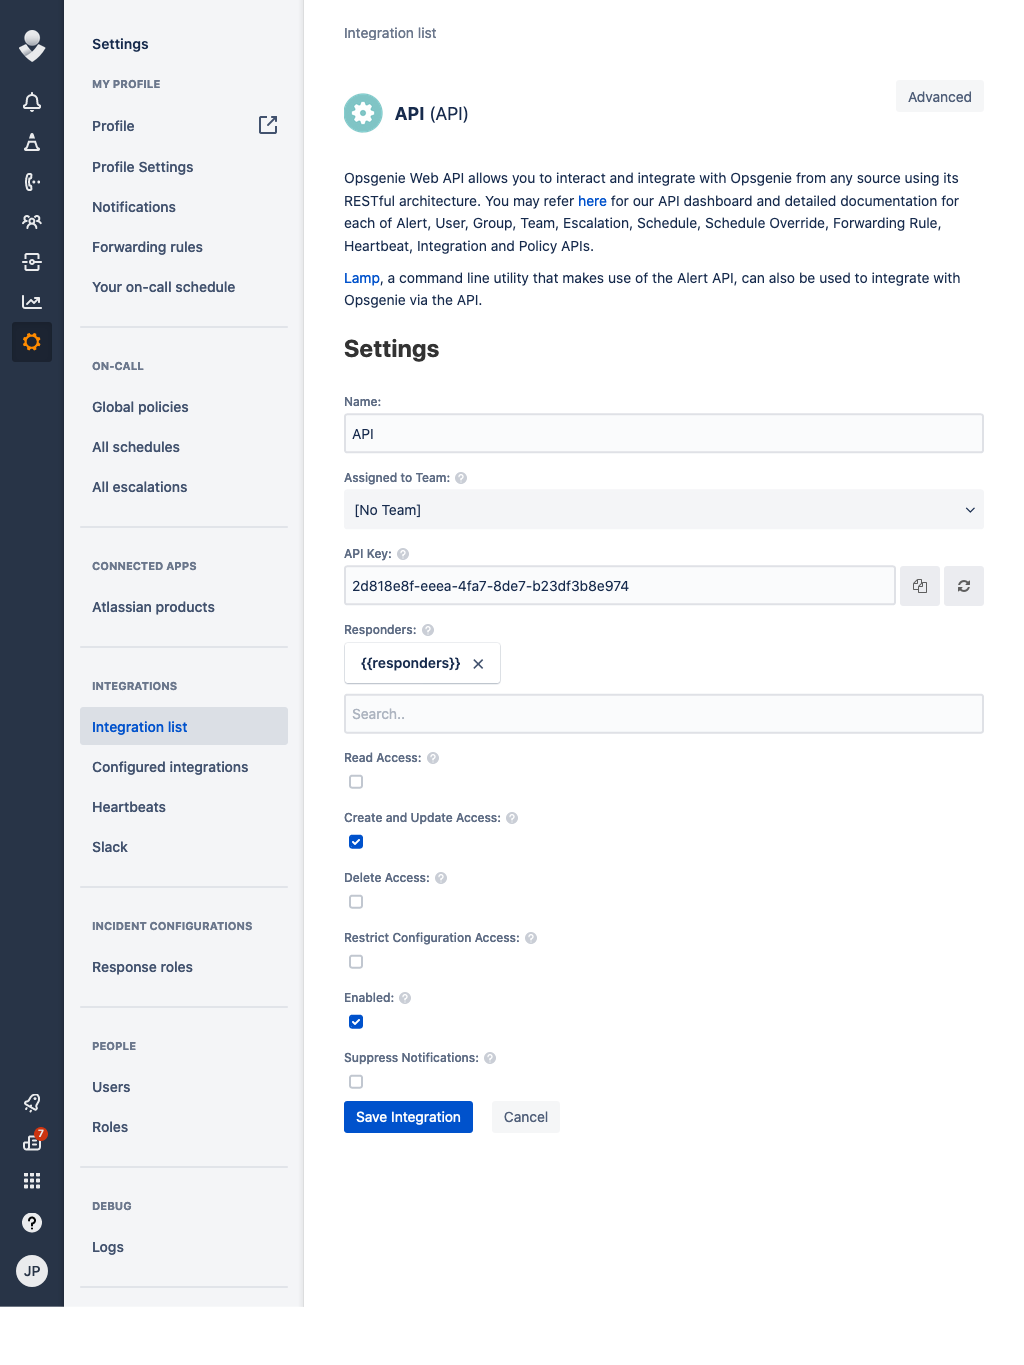
Make sure Create and Update Access and Enabled are checked and click Save Integration
-
Copy the API Key
-
Format the service URL
The host can be either api.opsgenie.com or api.eu.opsgenie.com depending on the location of your instance. See the OpsGenie documentation for details.
opsgenie://api.opsgenie.com/eb243592-faa2-4ba2-a551q-1afdf565c889
                            └───────────────────────────────────┘
                                           token
Passing parameters via code
If you want to, you can pass additional parameters to the send function.
The following example contains all parameters that are currently supported.
service.Send("An example alert message", &types.Params{
    "alias":       "Life is too short for no alias",
    "description": "Every alert needs a description",
    "responders":  `[{"id":"4513b7ea-3b91-438f-b7e4-e3e54af9147c","type":"team"},{"name":"NOC","type":"team"}]`,
    "visibleTo":   `[{"id":"4513b7ea-3b91-438f-b7e4-e3e54af9147c","type":"team"},{"name":"rocket_team","type":"team"}]`,
    "actions":     "An action",
    "tags":        "tag1 tag2",
    "details":     `{"key1": "value1", "key2": "value2"}`,
    "entity":      "An example entity",
    "source":      "The source",
    "priority":    "P1",
    "user":        "Dracula",
    "note":        "Here is a note",
})
Optional parameters
You can optionally specify the parameters in the URL:
opsgenie://api.opsgenie.com/eb243592-faa2-4ba2-a551q-1afdf565c889?alias=Life+is+too+short+for+no+alias&description=Every+alert+needs+a+description&actions=An+action&tags=["tag1","tag2"]&entity=An+example+entity&source=The+source&priority=P1&user=Dracula¬e=Here+is+a+note
Example using the command line:
shoutrrr send -u 'opsgenie://api.eu.opsgenie.com/token?tags=["tag1","tag2"]&description=testing&responders=[{"username":"superuser", "type": "user"}]&entity=Example Entity&source=Example Source&actions=["asdf", "bcde"]' -m "Hello World6"